Showing posts with label PC. Show all posts

Monday, January 11, 2016

How to clean your keyboard's keys with a piece of clear tape

How to clean your keyboard's keys with a piece of clear tape

How to clean your keyboard's keys with a piece of clear tape


No matter how often you clean your keyboard, in-between and underneath the keys are likely filthy, especially if you have pets.

If flipping the keyboard upside-down and shaking it doesn't cut it, the best way to get underneath the edges of your keys is to use something you probably already have around your house: tape.

What kind of tape to use

Any kind of low-adhesive tape is fine. Avoid tape that has a lot off stickiness that will leave behind a residue, like duct tape or aviator tape. Clear tape -- the kind you wrap gifts with -- is an ideal choice, since it's thin and easy to manipulate. Sticky notes work in a pinch, too.

How to stickie your way to clean
Cleaning your keyboard with tape is fairly simple. Here's how to stick it to those keyboard dust bunnies:


  • Tear off an inch of tape and fold it in half so that the non-sticky sides are facing together and the sticky sides are facing outward.
  • Slip the tap underneath the edges of the keys and rub back and forth a few times.
  • Pull the piece of tape out and prepare to be disgusted.
  • Repeat until all of your keys are clean.
  • I have done this little cleaning trick even when I thought my keyboard was sparkly clean and still was horrified every time. You just don't realize how much dust and cat hair can accumulate under keys.

Monday, October 28, 2013

How to play Windows games on a Mac

How to play Windows games on a Mac

Play games designed for Windows on your Mac will not be a hassle . There are a few ways to make that happen and a good selection of software out there to help you. Some virtualization methods are cheaper than others , but programs like CrossOver , Wine , Parallels and VMware will help you do the job. Check out our guide to help you choose the option that suits you you. See also Group test : What 's the best PC game ?

Play Windows games on a Mac with Boot Camp

Apple virtualization solution is very simple . By installing Boot Camp and Windows on your computer, you can run the Windows boot and start playing from there , if your system has the graphics power to keep . Apple says that Boot Camp is a good choice because it does not let the fight against the same performance issues that come with emulators .
You can install Windows and iOS side to side and switch between the two just using Boot Camp . During installation , the auxiliary tool is to host , without removing it from Mac . Partition a Windows operating system A disadvantage is that a reboot every time may change you. Operating systems , which is annoying
Apple Boot Camp is fully compatible with Windows XP , Vista and Windows 7 . You have the option to tell the operating system to default . Restart your computer The files of the programs that are installed will be sent to the operating system partition is active . Boot Camp is a licensed Windows installation disc , it may not be an option for some .

You can see our guide on how to boot with Windows 7 Mac dual or triple here .

Play Windows games on a Mac using Wine

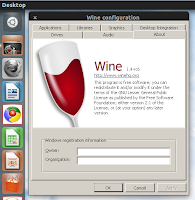
Wine is a free open source alternative 1.4Wine and CrossOver they can save some money . The application is still in Beta , so here and there expect the occasional hiccup . Not all programs smoothly , but the product is still proving to be among the online users very popular.
Wine can access the contents of Windows on a Mac by creating separate prefixes for each application . It is not an application in itself, but a tool that allows your computer to run programs not be used. You will not be much of a performance drop experience either , which is ideal if you want to avoid delay of the game .
As with CrossOver , Wine struggle with new games and skills through previous versions . Be warned , while some applications will work normally, other cargo is all . Linux users need to visit our guide on how to run Windows programs on Linux with Wine .
The wine online database is particularly useful application . It contains the top 25 games and tools that work seamlessly on virtualization , along with fixes known bugs , email support , and a library on the application, the developer navigate . Big titles like World of Warcraft and Blizzard Bethesda Fallout 3 works very well in Wine .
More about Wine 1.4 here .


Play Windows games on a Mac with CrossOver

10This application designed by Code Weaver CrossOver Mac can install on your Mac PC. Many popular Windows applications and games CrossOver is a paid version of Wine , and serves as an alternative that comes with additional support and product updates .
You 'll be pleased to know that an affordable product . Can CrossOver trial for a period of two weeks and then there is a £ 25 price tag for the basic package to offer , giving you a month email support with the software itself .
CrossOver XI is the name of the latest version and it is fully compatible with the latest update for Mac 10.8 Mountain Lion . Linux users are in luck too, although the installation process takes a little longer . If you want to ensure that you are able to use your favorite programs before you will be , it is advisable to try the ' what works ? Feature on the site. Since the use of the tool , we found that CrossOver works with a good selection of popular games including : Team Fortress 2 The Elder Scrolls V : . Skyrim and Portal 2 Valve Steam Client games also supported.
Older applications play much better with CrossOver . If you want the latest versions of Microsoft software , such as Excel , Word and Powerpoint use , you're on a bumpy ride . Code Weaver team warns : " In our tests , we find that these applications have bugs that prevent it running smoothly . "
You do not need a Windows license to run CrossOver needed . Definitely a decent price , but in terms of functionality of the software is far from perfect .
More about CrossOver Mac Standard Edition 10 .


Play Windows games on a Mac with Parallels Desktop 7

Parallels Desktop 7 for Mac Review This is one of the most expensive we've found , but it works a treat . Parallels to run a Windows license but if you sort that out you will be rewarded with one of the softer parts of virtualization software out there . First time buyers will have to pay £ 65 , but the upgrade from earlier versions cost £ 35 . As with CrossOver , a trial version is available .
Mobile users can expand . Their experience in the use of the remote application The mobile application works with the iPad , iPhone and iPod Touch with internet connection and you can control from the palm of your hand your desktop. There is a slight decrease in visual quality , but the app is only £ 2.99 .
Although Parallels Desktop 7 is more expensive than the other programs that we have covered , is relatively easy to use and works well with most tasks . A recent update means that the program not only works with Apple Mountain Lion , but also build the current Windows 8 Preview .
Features include integrated store which to buy your Windows programs and the ability to Mac iSight camera from within the Windows operating system . The installation is very simple and Microsoft Office 2010 , which many other virtualization tools struggle with , works perfectly here .
You may have to pay more than CrossOver , but the features included with Parallels Desktop 7 justify the discharge. You can read our full review of Parallels Desktop 7 here.

Play Windows games on a Mac with VMware Fusion 4

VMware Fusion 4VMWARE offers customizable features that most virtualization programs we have seen . Costs £ 39.99 , offers a variety of features and user interface modes . You can choose from a full screen option , a viewing window mode Unity . VMware recommends Unity eye for most users , offering an experience " fully integrated " . Choose this option , and you do not see the Windows taskbar or icons . It will seem like you are using a Mac regularly to the untrained eye, but you will also work undercover windows.
If you've tried Parallels Desktop and fancy a change , allows you to import VMware virtual machines above . It is a useful function , taking into account the creation of new partitions from scratch may take a while . Also do not need to reboot when you change your operating system.
Fusion applications such as Microsoft Project , Access and Internet Explorer , but how they do in the game process ? VMware online reports suggest that may be involved in the execution of games smoothly temperamental. You should be able to use your peripherals , however , that the application only Windows USB devices such as gamepads and joysticks handle.
VMware Fusion 4 for Mac is £ 39.99 and you can try it for 30 days before deciding whether to make the purchase or not. The bundle package in the official product website offers a good value for money , which comes with 18 months of free email support and 12 - month free subscription to McAfee antivirus .

Friday, October 11, 2013

How to install and run the Android OS on Windows

How to install and run the Android OS on Windows


Want to try Android on your Windows machine , you get a sample of the latest version of Android for testing or pleasure, or even to develop applications for Android ? Whatever your needs may be , this is how you can try the latest Android in Windows .

If Android is a mobile technology platform open source , which means that anyone can access images or system code of AOSP (Android Open Source Project) . And that's what you need to run Windows virtually Android .


 Android can be easily virtualized Windows PC . It's as easy as downloading a number of tools , installation, configuration and run . What you need is the appropriate procedure that we will display here , along with some solutions to common problems to solve .

Recommended reading: 10 Tips to increase the security of your Android device

Note: This tutorial is written for Jelly Bean Android 4.2.2 virtualize with 64 - bit Android SDK package runs on Windows 8, but the steps will be similar for other version of Android, or Windows architecture or release .

Requirements
Let's start by looking through the requirements to run Android in a virtual environment .

(1)
Windows PC : a computer with XP or a later version of Windows operating system will work fine , ie XP , Vista, 7 , 8, or later.

(2)
Java : Java 6 or later must be installed on the computer , higher, as it is required by the Android SDK Bundle . Install the latest version of Java for the platform.

(3)
It requires the latest version of Android SDK package : Android SDK Bundle . Download and extract the file to a folder. You will see a folder named " adt - package - windows - ... " This directory is known as the " Android SDK Folder" for the rest of this tutorial. It contains two folders called " Eclipse " and " SDK" and a file called "SDK Manager.exe " .


(4)
Android SDK packages : . Open "SDK Manager.exe " in the Android SDK folder check " Android 4.2.2 (API 17 )" in the SDK Manager . This gives the required packages with Android SDK in a virtualized environment .


Note : You can reduce unnecessary discharge unchecking sub - package version of Android. Click the expansion button ( > ) next to the Android version . View just this sub - packages:


  • Platform SDK
  • V7A ARM EABI system image
  • Google APIs.

Click Install Packages ... to download and install the necessary packages .

Start And Run Android virtual device

It's time to create your first virtual Android device .

(1)
Open "SDK Manager.exe " in the Android SDK folder . Go to Tools > Manage AVDS . This opens the Android Virtual Device Manager .


(2)
Click the New button ... ( Top right ) and you the Create new Android Virtual Device ( AVD ) to see the window. Sets the new AVD in accordance with the following settings :


  • AVD Name : Any name
  • Device: Galaxy Nexus ( 4.65 " , 720 x 1280 : xhdpi )
  • Purpose : Android 4.2.2 - API Level 17
  • CPU / ABI : ARM ( armeabi - V7A )
  • Keyboard: Tested
  • Skin: Proven
  • Front Camera : No
  • Back camera: No
  • Memory Options - RAM: 768
  • Memory Options - VM Heap: 32
  • Internal storage : 200 MiB
  • SD card - Size : 500 MiB
  • Emulation Options - Snapshot : Off
  • Emulation Options - Use Host GPU : Off


(3)
You can view the list of existing AVDS AVD Manager . Congratulations on making your first Android Virtual Device !

To start this , select the AVD in the AVD Manager . Click Start , click Start. Wait for the start and then enjoy.


And there you have Android running on your Windows PC . 'Go Click around and get an idea of ​​the Android interface ( if this is your first time) before moving on to the next section to test Android apps .


Install App In AVD
While Google Play Store is the primary source of Android apps , unfortunately , not in the Android Virtual Device ( AVD ) . However, there is a method to install the AVD with Android Debug Bridge (ADB ) applications. It will also show you how to remove . PUA

Installing an application
Let's run through the steps necessary to install an application. We use the Mini UC Browser as an example .

(1)
With AVD running , download the apk file to UC Browser Mini zoom applications (search for your application , open the page for your application from the search results , click the Download tab on the open page , and click click the option directly Download APK file ) .

(2)
Copy the downloaded file to "folder \ sdk \ Android SDK Platform -tools " .

(3)
Open the command prompt from the Start menu or the screen and enter :

cd <Android SDK Folder file path>\sdk\platform-tools

For example , the Android SDK folder on our test equipment is in " D : \ and \ adt - lightning " , says the command " cd D : \ and \ adt - Bundle \ sdk \ Platform -tools " .

(4)
Type " adb start - server " at the prompt. It should inform the daemon started successfully .


5)
Type " adb devices" at the prompt. It should be reported as " emulator " a connected device. If no device is reported , then you have not started the AVD. Reboot, wait for the Android home screen and re - type " adb - devices " at the prompt.


(6)
Type " adb install < APK < File" in the indicator after replacing < APK < File with the name . Apk ( Android application ) to be installed on the AVD. Eg . Apk in our test system was initially named " ucb - mini.apk " adb install command reads UCB - mini.apk .

(7)
Wait while pushing ADB apk file on AVD and installs it. It may take some time depending on the size of the application being installed. When the installation is complete , you must tell success.


Remove an application
Within the DSA , go to Settings and then downloaded the application launcher, go to Programs> . Click the application you want to delete, then click Delete . Click OK to confirm rather than wait . That's it.

Troubleshooting
Finally, here are some of the problems that can arise and the suggested solutions .

Internet does not work in AVD.
Check that your firewall or Internet security program is blocking access to the Internet for a program called " emulator - arm.exe " .

You no more than 768MiB of RAM for the AVD.
AVD adjustment greater than 768MiB RAM for Windows will not crash the AVD - memory allocation necessary due to the limitations of the platform. Choose up to 768MiB accidents if you experience problems or errors.

AVD is running too slow or freezes
Running the latest Android versions 768MiB RAM can take it easy . In addition , the slower you have many apps installed become the AVD. If you need a fast and responsive AVD , then create a new AVD with a previous version of Android (Android 4.0 ICS or earlier work best ) .

You can follow us on Twitter, add us to your circle on Google+ or like our Facebook page to stay updated on the latest news from Microsoft, Google, Apple and the web. 

See Video


Wednesday, September 18, 2013

How to Dual and Triple Boot Windows 7, Apple Mac OS X and Ubuntu 9.10 on a Laptop / Computer

How to Dual and Triple Boot Windows 7, Apple Mac OS X and Ubuntu 9.10 on a Laptop / Computer

Introduction

This tutorial is aimed at people who have some to a lot of knowledge of computers, partitions and operating systems. If your computer can plan on formatting you consider my other hub :

The total time to do all this in 1 go should be around 3 + / - hours. I will post links on where to get the DVDs . ( Google ) .

/ / Ay Guys I installed the latest Ubuntu 10.04 and it works great with dualboot for those wanting to experiement or too nervous about going all the way .. yum :)


What do you need ....... to work

Click edit above to add content to this empty capsule.

  • A copy of iATKOS , iPC , Kalyway DVD (Snow Leopard not supported yet )
  • Windows 7 RTM DVD
  • Ubuntu 9.10 (latest ) DVD
  • A computer / laptop for decent work
  • A second internet source ( in case something goes wrong)
  • Printed version of this guide (unless viewing without another machine )
  • Irons Suggested Laptops are Dell , Acer and HP .


 Disclaimer

Click edit above to add content to this empty capsule.

I have no responsibility for any problems that you get to follow this tutorial to take. Following the tutorial comes with your laptop / computer machine under his own responsibility and desire to improve. agreement

Let's start 

Step 1: Install Windows 7

Installing Windows 7 is easy and should take between 15 minutes - 40 minutes ( depending on the device ) .

First you start with a Windows 7 DVD you've probably burned. Prefer erasing a hard drive and " clean installing " Windows there. Upgrade if you want it to be. Once installation is complete, reboot your machine and go directly to Windows . Configure Windows to your taste and install drivers if needed.

If you want Windows 7 , Ubuntu and Mac OSX (Triple Boot) go to step 2 .
If you want Windows 7 and Mac OSX (Dual Boot) go to step 3 .


Step 2 : Install Ubuntu (not necessary )

There are two main ways to install Ubuntu. I'm going to do it the way I find it easier and easier to use .

Log into your Windows and insert the Ubuntu Disk . If the installer opens automatically great. If not browse the disk and look for Wubi . Run Wubi and the installer appears . As an installation option "Install inside Windows " . This is the easiest way to install, even for the most novice of computer users. Ubuntu Select a drive (Use the same as Windows ) , select a minimum of 7 gigs of space for Ubuntu. Enter your user name and password for the new account. Installation takes about 30 minutes or less .

Reboot your machine and Ubuntu should appear under Windows 7 highlight it with the arrow keys and press Enter. Ubuntu start now. Install any nessesary programs , drivers and explore your new Ubuntu : ^ ) . Shut down the computer .

Congratulations so far have Windows 7 and Ubuntu installed and running properly . Grad a drink and food now .

Go to step 3 to install Mac OSX

Step 3 : Install Mac OSX

Boot into Windows 7 . In the Start menu search " computer management " (Here is where we partition a drive for Mac ) . In the left pane , select Disk Management and partition 15GB or more for Mac OSX. The partition must be formatted as FAT32 . Insert the disk and restart your Mac OSX system .

It begins in the Mac OSX disk . When prompted to install in type ' x' seconds " - v " without quotes. A bunch of writing should appear and stay on the screen for about 5 minutes or less .

When prompted Disk Utility in the top panel and select the partition you plan on installing Mac deleted. OSX Format the partition as Mac OS Journal. Close the window and select Install. Let it install, this should take about 20 minutes. Afterwards Mac OSX with boot, you will notice that the sound is not yet over and the resolution is higher.


Step 3: Install Mac OS X - continued -

Now it's up to you to install the drivers your new Hackintosh machine will require. For Dell Inspiron Users I'll be putting together a package for download to get the drivers. But some googling until then.

Almost finished , we headed to the final steps. When you reboot and select Windows you'll notice that you are not able to. Reboot your computer but insert the Windows 7 (or even Vista) and select " repair " when you make your load. Select " Startup repair " , this should take about a minute or so . Reboot and you'll notice Mac OSX is missing. Boot into Windows 7 and download a program called " EasyBCD " . Add Open the program and select the message (We'll add the Mac OSX entry . Substation select from the dropdown menu select Mac . "Boot ." Now reboot and go.

FINISH

The last thing you need to do is update your programs and software on your OS . Has officially completed the Tutorial.

Do not be shy to my other pages and comment and take a short look at the poll below , thank ..... do not forget to comment if it works well .

You Also Read:- 

How to install OS X Mountain Lion Hackintosh on PC [Tutorial]

Analyst: Apple to launch iPhone 5s 128GB


You can follow us on Twitter, add us to your circle on Google+ or like our Facebook page to stay updated on the latest news from Microsoft, Google, Apple and the web. 

Tuesday, September 10, 2013

Windows  8.1 RTM Download now officially available on MSDN and TechNet

Windows 8.1 RTM Download now officially available on MSDN and TechNet

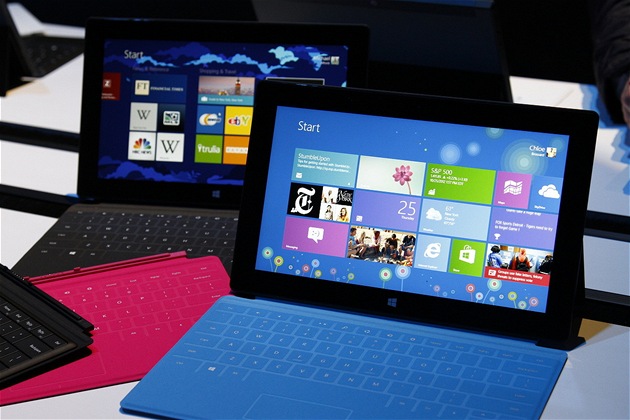
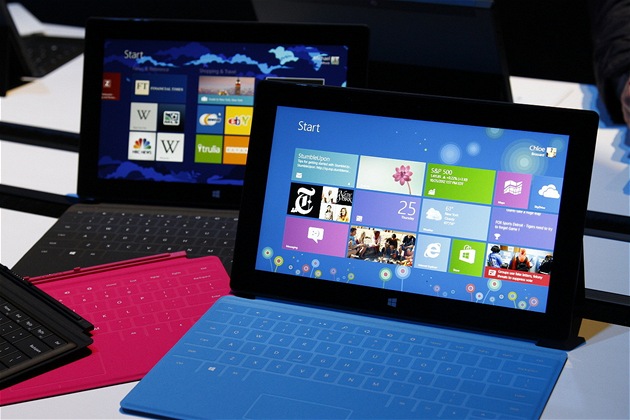
MSDN and TechNet Windows 8.1 users can now download official RTM bits. It is fair to say that , in terms of new releases of Windows go , Windows 8 was not the most well received . With many user reviews dismayed at the extent of the changes , Microsoft has recently returned to the drawing board , holding a number of new implementations while offering a bit more insight into the procedure .

The drastic change from the traditional home button is perhaps the most talked about feature of the party, and although it is quite small in the grand scheme of the Microsoft operating system , many users had drawn feel like the proverbial rug out from under them when the function in the long term rather unceremoniously retired.


Not long ago we heard that Windows 8.1 was officially RTM , but now it actually has thrown the two tied to the development networks . Initially , the Redmond insisted on TechNet and MSDN subscribers would not be seeing the version before the official release of 18 October - a decision that sparked a large protest .

Bowing to the pressure , and not for the first time , Microsoft backup - follow to keep happy to developers . To be honest, the original plan to hold back until later RTM would probably be at the expense of general operating system - a point repeated continuously by the developers of discomfort .


In addition to the release of the RTM , Microsoft also said that even changes in Windows 8.1 at this stage , despite the limitations of time means nothing too serious happens , the final push to the finishing touches will be attributable to the applicable initial decision to implement the early release of MSDN and TechNet .

The Windows 8.1 official release date for the general public is scheduled for October 18 , many new and exciting features. It will be a completely free upgrade for those who already have a machine or device is capable Windows 8 fluctuate , and is the second installment of a continuous connection with the annual release cycle .


We will keep you informed of any changes as we find them interesting, so stay tuned !

We also recommend you visit:

From Windows 8.1 Changes: This is what's new

New Features and Fixes Windows 8.1 Microsoft has announced

You can follow us on Twitter, add us to your circle on Google+ or like our Facebook page to stay updated on the latest news from Microsoft, Google, Apple and the web.